Friday 16 July 2021

One Year on and guess what - nothing's been done!

Same old story I'm afraid. Its been a year since my last post and absolutely nothing has happened on project J249. I am though now only 2 weeks away from ending my time with Honda, this brings great sadness at the job and people I will have to say goodbye to but also great eagerness to get things moving in the garage. 

Step 1 is to form a plan of what needs to be done and the best order to do it in, luckily I have a few weeks to look into that before I can get going.

So, watch this space as I can promise some updates before the end of the year!


Friday 22 May 2020

Its been a while.......

What can I say, its been a while since I posted an update to this blog. A few big things have happened in my personal life, I've learnt that Honda of The UK Manufacturing Ltd in Swindon in closing in July 21 and with it goes my job, the world has gone into lock down and Covid-19 is all that everyone is talking about. Luckily none of my family have been affected yet and I hope those reading this are in a similar position.

I've been working from home since March and really enjoying seeing the family more and watching my now 8 year old head swiftly towards being 9! That milestone also marks the same anniversary of loosing my dad and I still miss his little forays into the garage to dispense often odd advice.

It also marks the point of last real activity on the build, all I've done since is accumulate parts. In 2018 I went up to see GD in their new location to collect a car load of bits, my daughter and I had a great day out and got to spend some quality time together talking cars.


She also came to Stoneleigh last year with me, we paid our obligatory visit to the GD stand where the "orange and black one" was an absolute stunner. Though to be honest I think she really enjoyed the bouncy castle and hotdogs the most!


So what next, well I hope to get some time in the garage this year, if only to unearth project GD from its bric a brac grave and run the engine for the first time in 5 years 😟. But whatever happens in July next year I will suddenly have an abundance of time to get things done so I've pledged to get the car finished, hopefully by end of 2021/2022!! Yeah right!!!!

Monday 10 June 2013

Modern or classic?

One defining decision is do I go modern or stick with the classic look?

Here's a fairly classic look GD snapped at Stoneleigh a few years ago.


And then to something much more modern, its not a GD and it has side pipes but I kind of like the look of this car.

Not so sure about the interior colouring but the switches are modern and the rest is basically its a choice between big (18" front and 19" rear) or little (16 or 17") wheels.

Maybe traditional is best though.

Project concept.

For a long time the target that I have been aiming for has been unclear. Of course the end goal is a roadworthy GD427 that goes like stink and looks good but within that base aim there are options.

I've often fancied trying to do something a little bit different, something that sets my GD apart from the rest and in this section I will try and list up some of the ideas I have had over the course of the project so far.


Friday 9 September 2011

First start at home.

Well this blog is well out of date!!

This is jumping forward a bit as many things have happened since my last run of activity. Mainly my time is now mostly taken up with nappies etc following the happy arrival of our first daughter Emily.

In the garage I completed the engine install - details of that I will back fill later - and now it was ready to run.

So with a trusty assistant, thanks Andy, at the ready we went for first start.


Hummm not so great!

After a quick check of a few things we realised that a minor error had been made. Muggins here had forgotten that the Ford dizzy rotates anticlockwise and had put all the plug leads on in the wrong order!

So a quick re-arrangement took place and we tried again.


Success! With no silencing it was quite loud though not dreadful. the pipes were attached and it it was run again until the fan cut in to check we had cooling. All was well apart from a few water leaks.

This is the final video taken after she was put to bed for the night, couldn't resist one last run!


Thursday 11 August 2011

Gauges - the final decision!

Well, I did say I was prone to changing my mind, so to not disappoint
 
I've done it again. This time though it's the final decision and money has changed hands.

Keeping with my intention to maintain the classic instrument look but introduce a little modern tech to proceedings I kept looking about for an alternative to the speed hut offerings. Whereas it would have been nice to have unique logos on the gauges I was concerned at spending so much on gauges not sourced in the UK.

My targets were:

1)  White on black gauge design
2) Through the dial LED illumination.
3) All electric senders.
4) Minor gauges 270° sweep

Enter the Smiths Flight range.

In the end I went for

Speedometer
Tachometer
Fuel gauge
Water Temperature gauge
Oil Temperature gauge
Oil Pressure gauge
Voltmeter


Here's a brief video of the little dance they do at power on.

So that's one decision properly made - no going back!

Saturday 11 September 2010

Speed pulse ring.

As I mentioned during the proshaft install I thought I may have to remove the prop to fit the speed pulse ring which I had designed.

The theory was that a toothed ring would be fitted to the propshaft and an inductive sensor used to drive the speedometer. To this end I designed a suitable ring.

I then sourced an engineering firm and had it made.

Creative Water Jet were chosen and after many discussions with Richard Miles at Creative Water Jet about the design and how best to do it the parts were made and delivered.


I even got as far as starting to paint them. However a quick chat to Andy B and the plans have changed!

Andy was concerned that the prop would move around under load (something Richard also voiced but I in my wisdom decided to gloss over!) and that the the prop tube may not be totally round.

Andys preferred option is to stick magnets to the diff input flange and mount the sensor there, so thats what Im going to do.

So if any can think of a use of a very attractive aztec style sun let me know!!

Sunday 1 August 2010

Finishing off the shift mech.

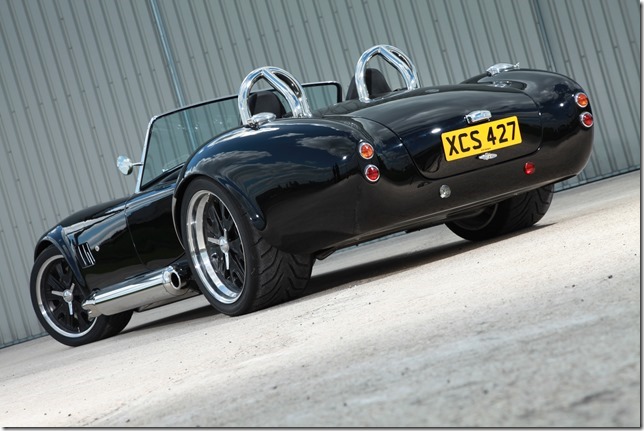
As previously shown the shift mech just would not work as Getrag intended with its new location in a GD chassis. A few mods were needed.

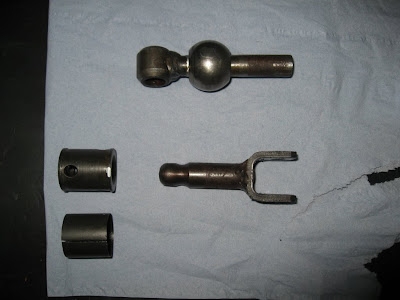
1. Separate the gear shift.


2. Cut off the silly lump at the top.


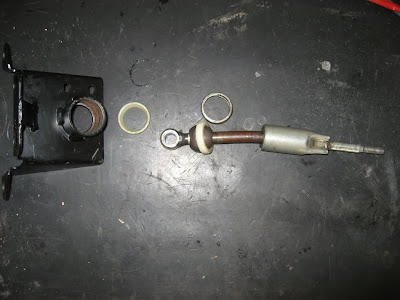
Here's all the relevant bits before modification.


3. Get your engineering firm to weld on a flag for the gear lever, albeit the wrong way round. Slight mix up with the drawings and the flag is 90° out.

No pic of it on its own Im afraid, too keen to get on!

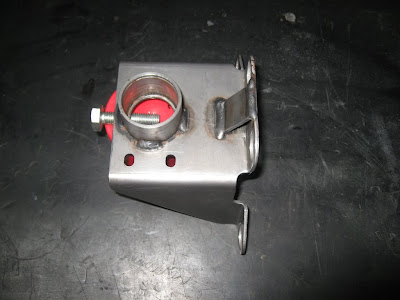
4. Clean and repaint mech carrier.

One with the shift lever in place.


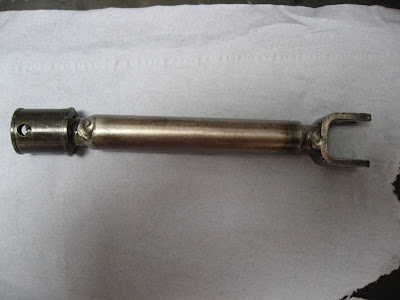
5. Get engineers to extend extend shift rod by 93mm


6. Refit with the spacers, new rubber bushes and shiney new washers!

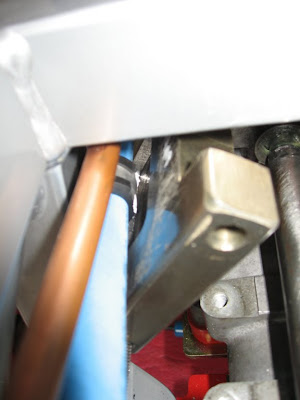
Now that sounds easy, but there was a small problem. In routing the fuel line in this area I managed to get on of teh clips right in the way. The shift mech spacer fouled on the clip and caused a hard touch, something I wanted to avoid to ensure if teh box moved I wouldnt get any problems.

The white paint marks where put on the clip to leave an impression of the spacer, with this done I then took the spacer back to PJO for a clearance area to be milled out.

Job done, no more hard touch.


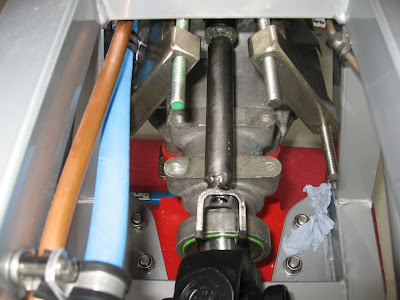
Both spacers in, the threaded rod thread locked in place and the shift rod re-attached.

I left it overnight for the thread lock to harden and then finished the install.


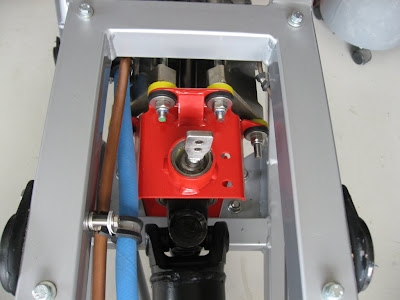
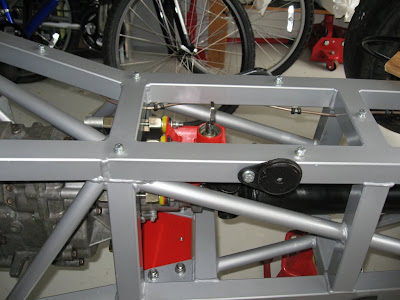
I have to say Im a bit chuffed with the way its turned out.

Wednesday 28 July 2010

Return Fuel line

I have for sometime been thinking that I may fit fuel injection in the future. So to make this as easy as possible I have decided to run a return fuel line in now, whilst I can easily get to hte chassis. Instead of another hard line Ive used Aeroquip push on hose as its more flexible and easier to route, it does however have a much bigger OD.

You can see from the previous post that it was roughly routed in when the prop went in, now its time to fix it.

To mount the hose I used clips, longer bolts and some section of 8mm tube. Job done.

Oh and Ive fitted the hard line adapter as well, so much easier with the right one! (engine bay end was a Veraflare not designed for metric pipe)

Propshaft

Somewhat unexpectedly a box was delivered last week containing my propshaft. I thought this was going to be one of the bits to be collected on my planned trip up to GD, more on that later.

So with it here it would be rude not to fit it! Now Ive heard all sorts of stories about it being a nightmare job due to the space restrictions and chassis tubes, in all honesty I didnt find it too bad. Now that may be because Im not using a tremec box. Just removed the brake union and jiggled it around till it went in!


Ive not tightened it up yet as it may have to come out again for the fitting of the speedo pulse ring, more on that later!

Saturday 24 July 2010

Coil Bracket

Yet another little job to be knocked off the list. I didnt want to mount the coil to the body of the car and the supplied bracket did not readily fit any of the mounting locations available on the engine. Now I have seen these things secured by just one bolt, but I didnt like that so I took a template from the front of the left hand cylinder head and designed a bracket.


Cleaned and sprayed with clear engine enamel it looks good, the coil is now securely held in place.

Friday 23 July 2010

Oil Pressure switch

Whilst sorting out the oil plumbing I had originally intended to mount the oil pressure switch, for the idiot light, in one of the oil lines. It then occurred to me that I could save a few quid and mount it into the block, where it would normally be mounted!

So I returned the expensive fancy adapter for a refund and exchanged it for a much cheaper threaded fitting.

One small problem though, I could not tighten it in with the fuel pump in place, so guess what, I had to take the pump out. Luckily I had a spare gasket and was able to refit the pump the same day!


Thats another job sorted and a few quid saved.

Monday 31 May 2010

Shift Mech extension.

Moving swiftly on to the next bit of metal work needed.

The shift mech. was removed to install the power train, a small problem was then encountered when attempting to fit it back in....it would not fit! The first of the tunnel cross members was bang on right where the shift leaver was supposed to be.

So as this could be a minor inconvenience, i.e no gears, I figured I had better sort it out.

After measuring things up I figured I needed to shift the mech. back around 90mm to clear the cross brace and give the bracket suitable strength to do the job. In the end I came up with a H shaped spacer that clears the cross member, flexed the old AutoCAD brain cells and made a wooden mock up.

After a few minutes juggling my mock up was in and I'm quite pleased. Ive only made on side as the other is identical.

You can see in the above picture how the gearshift would have fouled the chassis cross member, the attractive bit of 1960's banister rail has moved the mech back to a position where it will work.

Slightly wishing I had painted the gear box now, though its only aesthetics for these pictures!

I think the shift position is roughly around the position that the Tremec is so I'm quite please with that.

The drawing goes to PJO today and hopefully I may have the finished articles this week!

Next is to get the shift rod lengthened by the final figure of 93mm that the mech. has been displaced., then cut down the gear shift itself and modify to allow fitting of a new lever.

Once that's done its time to buy some stuff from GD!

Friday 28 May 2010

Clutch Bracket arrives!

1 week after the gearbox mount was collected I was able to go back and get the clutch bracket. Everything looked good again.

After forgetting to allow for the weld fillet in my design I had to grind a fair bit of material away on both the bracket and the slave retaining clamp. Of more serious concern was the fact that the slave didn't fit! So A little light hacksaw and Dremel work was required to modify the lower edge of the bracket.

With that done I trial fitted and it all lined up nicely.

A quick clean with the powered wire brush (bloomin hurts when it hits your finger!) sander and degreaser saw it ready and painted.


Final trial fitting is now done, all I need to do now is sort out a suitable return spring to make sure the release bearing keeps off of the diaphragm fingers during normal driving.


The only thing that I cant verify is the slave angle, to do that I need the body and master cylinder so I can operate the clutch. If the fork drags the pushrod through a steep angle I will need to pack either the front or back of the slave cylinder out from he bracket to compensate. Hopefully it will be OK as it is though.

Well chuffed, another job crossed off the list.

Thursday 20 May 2010

Bracket arrives!

Hoorah! The brackets have arrived...


They look exactly like what I wanted and even better, they fit!

So I cleaned them up (not so well it turns out) sprayed them in VHT engine enamel red and baked them in the oven (not so popular at home now!).


With some nice new stainless hardware they are bolted in and the gearbox is supported!


Clutch bracket ready tomorrow apparently, so watch this space....